Showing posts with label Garage. Show all posts

6/5/13

Adding Some Green

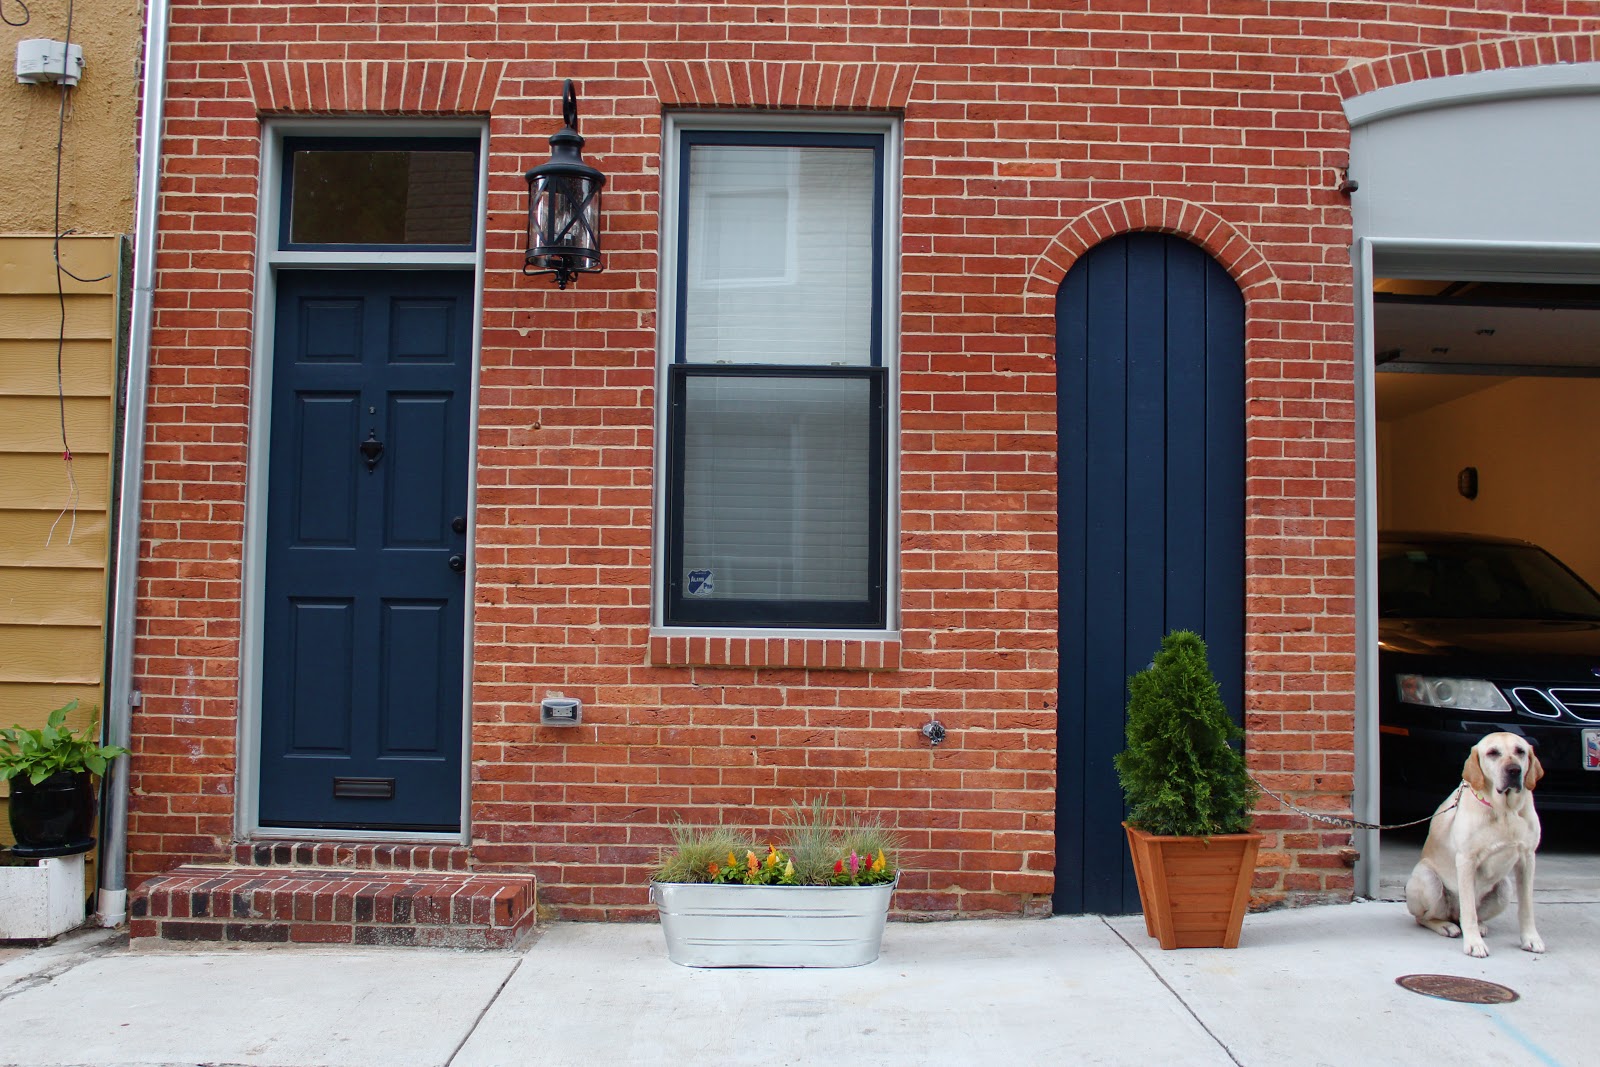
A few weeks ago, I decided that our house needed a little curb appeal. So, I made a trip to Home Depot to purchase a couple planters, some soil, and plants. I was being rather indecisive about planters so I decided to buy two of the wooden variety there, and move on to plan B. 

I have been in a galvanize tub kind of mood and found one for pretty cheap on Amazon. Two days later (thank you Amazon Prime) and this 16 gallon, shiny, trough arrived.
Then it rained. So my plants spent a little time indoors. 


Once it dried up, I was able to plant the two little, green trees that I purchased. 


 One for each side of the garage.


This one is also concealing our gas line (that couldn't be moved for whatever reason the City gave Mr. Contractor during the building stages). I am thinking now that I should paint the rest of it Navy. #mentalnote #todolist


This tree is not big enough to conceal our neighbors garbage can but, I have high hopes for it. 


After that, I was exhausted so, I hired out the rest of the work. No, not really. 


H was very excited to help plant at this stage. 

Having H help is a little bit like having a toddler around. They don't want to shop, prep, or clean up but, they certainly do want to get their hands dirty and jump in for the fun part. 

I call it 'stealing the glory'.  


Maui even decided to get in on the fun. Thankfully, she is a lady and doesn't pee on flowers. 


The ornamental grass and Celocia turned out pretty lovely if you ask me. 


And just in case one of us ever has a tapeworm we can ingest the flower for its medicinal properties to treat it.  


Seriously. Google it.

3/6/13

Growing Through Life

A few years ago, if you would have told me that my first house would be in this state, this city, I would have told you well... probably something not very nice. Even though my heart will always be in Jackson, Wyoming. I am trying not to be too crabby about it. 

Crabs are for eating, not for being. (or having but, thats another issue all together - ew!)

After 6 months of living in our house and 10 months after we started this project, we have finally been able to convert to our permanent loan. Just a few days ago we made our first true mortgage payment (at least in my mind as previously, we had been making payments to our construction loan). 

So, this bad boy, the property, the finished product, belongs to us. 


It may not look like much to some. Heck, it may look like a castle to others. What really matters is that H and I well, we like it a latte! 


9/21/12

Adirondack Love

As soon as I knew we were going to get our RTD I had been dreaming of a pair (or more) of pretty adirondack chairs to sit up there. Alas, most of the adirondack chairs that I've ever seen were in the $100-250 range, per chair. (Boo!)

Then the tides turned this spring while I was picking up some essentials in Home Depot. I found a pair unassembled and unfinished adirondack chairs on sale for $25 bucks! So, I grabbed two, paid, and ran like hell outa there thinking they had to be miss marked.

The chairs patiently waited in their boxes for some love until we moved. Once we cleared out our garage we finally had the space to tackle this project. I was hoping to paint THEN assemble but, H had another idea. He snuck into the garage claiming he was going to put them together on his own. I think he was just anxious to use his drill, boys and power tools. <insert eye roll here>

So, without protesting I just let him be. Pretty soon he emerged and claimed 'they were good to go'. Translation: 'You can do the rest.' 

After a little sanding and cleaning, the chairs were ready for some paint. Although they are kind of pretty in their au naturale state.


At first I had grand dreams of spray painting these suckers. The idea of spray paint just seems so lovely; quick and easy. But, after a few spray painting test runs I decided I loved these chairs too much to mess up with my amature technique so, I went back to the home improvement store and found a regular old can o paint. 


From day one I knew these babies had to be painted happiest color of them all, yellow! Plus I'm a Steelers girl living in Baltimore so, what else was I to do?!

This was a blessing because the Rust-oleum Sun Yellow if far superior to the other, at least in my opinion. Valspar products are great but, this particular yellow is the perfect bright and cheery color I was looking for.


Hand painting these chairs was also the way to go. Next time however, I will race H to the garage and paint them BEFORE assembly. It is just more efficient in the long run, getting into all of those nooks and crannies can be tough.

Here is the finished product.
 

These lovelies are now perched on the RTD and they make our little bit of outdoor space even better, especially with a warm cup of coffee or a frosty beverage.

8/16/12

Nice Angles!

Well, folks. Here it is. The moment you've all been waiting for!

But, first. I must ramble (as per usual).

Remember how I told you just how amazing my friend, James is? Well, here's another example: he arranged for a professional photographer to come through our house (minutes) before we moved in so, I could show all of you lovelies how amazing our little has project turned out!

If you need a reminder of how things started, please refer back to: Ch-Ch-Ch-Ch-Changes (Part One) and Ch-Ch-Ch-Ch-Changes (Part Two).

Side note: The professional pictures are gorgeous! They are so clear and beautiful and HUGE they make me dream of a bigger, fancier camera (hint, hint H; cough Christmas, cough birthday). That being said, they don't fit on this blog (you may have to scroll left to right to view the entire picture) as it is formatted and I thought it a little silly to reformat for just one post. But, enough of this babble. Let's get to the good stuff!

The glorious exterior.
 Head on.
Moving inside:

The living room and the front door. (I heart the exposed brick)
The wall color throughout the majority of the house is Benjamin Moore's Horizon (OC-53). It is a very light gray color. If I were doing it again I would have gone a hair darker but, as it stands it will be SO easy to live and decorate with.
View from the front door of the living room. 
Open concept. Doors to the mud room>garage and powder room are on the right.


Kitchen featuring: H's Super Fridge, the Carara marble countertops, butchers block island, and subway tile backsplash. Love x4.
View of the kitchen and living room. 
You can also see the door to the pantry (I'll take detailed a picture of that down the road- simply because it is awesome!). The small door to the left of the pantry is for under-stair storage.


The dining "room" with my built-in bench seating and french doors to the patio.
Mud room. (LOVE!) 
Utility closet on left. Garage entrance on right. Benches for storage and coat hooks all around. The brick tile floor ties in to the front entrance (shown above).
Going up:

The staircase.

Office (or second bedroom as needed). 

Office view from windows. 
Trying to decide what to display above the closet. Ideas?
Guest bedroom.
Guest bedroom view from windows. 
The high ceilings and the transoms above the windows make the upstairs rooms extra special.
Master bedroom. 
The wall color is Benjamin Moore's Wedgewood Gray (HC-143). Which, doesn't really look this bright in real life. It is a much deeper blue/green and I am in love with it. I received the suggestion from a friend/interior designer. Thank you Bea!
 Master closet. (part of it at least, there's more to the left that wouldn't fit in the picture #spoiled)
 Our master vanity.
I will have to take a picture of our master shower in its entirety. It is spectacular. It has white subway tile, a marble bench, and marble hex tile floor. We also have two shower heads, one of which is a rain-shower.


And finally, who could forget the RTD?!


That's all for now, I will post more of the up close and personal professional pictures soon. 

H and I could not be more proud of how it turned out.  We are so in love and hope that you all are as infatuated as we are. 

We are so grateful for the amazing opportunity we have been given to own a home like this. It has taken a lot of time and effort to get to this point of our housing tale and we couldn't have done it alone (obviously-H can barely change the batteries in a smoke detector).  Our friends and families have been wonderful supporters of our project. But, on the front lines have been James and Mr. C.

Their efforts (individually and collaboratively) made this happen for us. Both of these gentlemen are professional, respectful, knowledgeable, kind, and outrageously handsome little devils. We have thoroughly enjoyed our time working with you and appreciate all you have done to get us into our new home.

Thank you both for everything!

For now, CHEERS to humble and happy (Charm City) living!

7/17/12

The Final Countdown

Everything is happening so quickly at the house now. Thankfully, because two weeks from today we are supposed to move out of our rental. (ohmygoodnessiamfreakingout)

Last week our closets were built but, looked a little bare. 
Our master walk-in closet, then.
(for future reference this is, "Side B")

Mr. C requested that I tell him how we wanted the master walk-in closet to be customized. Rather than typing a lengthy (and most likely confusing) essay describing the closet; I decided to channel my inner architect.

(Don't be jealous of my amazingly untapped and outstanding graphics skills) 


When I went to see the house this week my vision had come alive!


"Side A"


"Side B"


"Side C"

Corner of "B/C" 

Both of the smaller bedroom closets look like this.


The trim (was installed), closets, and internal doors have all been painted. I promised you that they wouldn't stay that yucky off-white color with the gold hardware!


A few weeks ago, Mr. C asked me to choose two paint colors that would go throughout the house. There is a "house color" which, the majority of the walls will be painted. As well as a second color that is going in the master bedroom and the second bath. You can see a smidgen of that color in the picture below. Please note that this is one, wet coat of the color that was accidentally (whoops!) painted in the master bath; so, not that accurate of a portrayal but, good enough for a teaser.


I will (officially) revile both of the colors later this week.

Last week you saw the second bath's tile. Now, here is a sneak peak at the the master bath tile.


The kitchen pantry shelves were built and installed.

The windows and doors were trimmed.
Kitchen window (above sink)

The door to the back "patio" was installed. Here is one of the doors (& me- Hi Mom!)

AC unit. Which, apparently even H's oldest brother, "Big J" who, is an expert in such equipment was impressed with the model.

Things that are still to come:
Paint
Flooring
Cabinets
Posts and rails for internal staircase
Plumbing fixtures
Appliances
Fence
Stairs to RTD
Garage door
For now, the construction crew boards it up each night with that trusty plywood.

Two weeks to go. Anyone placing any bets?